Pages

Showing posts with label Holiday Crafts. Show all posts

Wednesday, February 13, 2013

Pinteresting Valentines

Today at Practical Scrappers the designers used Pinterest as our inspiration for Valentine related paper crafts!  I needed some Valentines for my daughters teachers and found this adorable chalkboard idea from Paper-Source

valentinepin

Here is the Valentine I created for Practical Scrappers:

OLYMPUS DIGITAL CAMERAAnd a second Valentine I created for my other daughter's teacher:

OLYMPUS DIGITAL CAMERA


Come see what fun stuff the other designers came up with over at Practical Scrappers!


Happy Valentine's Day and please share your Valentine's Day ideas!

Thursday, February 7, 2013

Berry Sweet Valentine!

20130207_103936Super quick idea for Valentine's for the little one's to take to their classrooms!  I made the card on Print Shop and put the note and candy into Cello card bags I had left over.  You could just use Zippy bags too!  The note says "You are Berry Sweet, Happy Valentine's Day!"

Other message ideas: "You are a Berry Good Friend", "To the Berry Best Teacher", "Have a Berry Happy Valentine's Day".

Have fun with it!

Tuesday, February 5, 2013

Masculine Mustache Valentine

This year was a first for us.  My 5 year old got a male kindergarten teacher.  We were not sure what to expect at first but he has been amazing and we could not be happier with him as her teacher.  It is not that we were afraid that he would not be a good teacher or anything like that, we were concerned with how my very girly daughter would adapt to spending most of her day with a man other than Daddy.  She has blossomed into this smart, funny, kind little girl and we are more than impressed with her transformation....Let's just say she was a HANDFUL as a 3 and 4 year old:)

So we wanted to create an extra special Valentine for him but I was not sure what to do that was not too girly.  My daughter went to a birthday party and one of the favors was a sparkly mustache...It WAS PERFECT! 
OLYMPUS DIGITAL CAMERA

I have heard lots of puns about mustache as of late and I started playing with the word in my mind to come up with an appropriate saying.  Here is what I came up with!

OLYMPUS DIGITAL CAMERA
The postcard is hand drawn on the back and my daughter cannot wait to fill it out and give in to him on Valentine's Day!

Please share your Valentine's creations in the comments!  I would love to see your creations!

Thursday, December 20, 2012

Layout Sketch Challenge

Today at Practical Scrappers we used an amazing sketch to create layouts!  Go on over there to see the sketch and the other takes on it!


Here are some photos of the details!


Thanks for the sketch! I had a lot of fun creating with it!

Saturday, December 15, 2012

My First Card Sketch

One of the ways scrappers come up with inspiration for projects is by taking a sketch designed by another scrapper and making it their own.  I have never attempted a sketch of my own until now.  I have always wondered how hard it would be to create a sketch for a layout or card and was surprised at how quickly it came together.  I used Microsoft PowerPoint and it was very simple.


Here is the card that I created using this sketch.


and some close ups of the details


We used this Sketch for a Post on the design team over at Practical Scrappers.  Make sure to check out what the other designers came up with!!  It was very exciting see my card translated into several different cards!  Beautiful job ladies!!


Wednesday, December 12, 2012

Christmas Decorations as Embellishments

Over at Practical Scrappers today we were challenged to use Holiday decorations on our scrapbook layouts!  Here is what I came up with but be sure to stop by and see the other creative ladies' creations!


I used ornament hooks to create the heart. (I used Gloo to attach them)


I used a snowflake ornament to frame part of the photograph


And I used these candy cane covers as embellishments


It is always a lot of fun being challenged to use items I would not typically use on my pages!

Thursday, December 6, 2012

Double Christmas Layout: Get those Pictures on the Page!

It is hard to come up with a layout that you love that includes more than one or two photos!  I know!  I created this versatile layout for 4 4X6 photos.  I hope to give you an idea for getting all your Christmas (or any other) photos out of their boxes and onto the pages of your scrapbooks for everyone to see!


I am guilty!!  I have several years worth of pictures to scrap and most of my pages have only one or two pictures on them.  At that rate, I will NEVER catch up!!  It was time to come up with a layout that will display more than one or two photos at a time.


I found that if I took four 4X6 photos and laid them out in a square formation like this they fit with a perfect one inch border.


I placed the word Christmas between the pages to bring the viewer's eye together to see this as one layout.


A few other embellishments really brought this layout together!


Have fun with it!  You could even use one box for journaling and use 7 pictures!  This layout can be used for any event that you have numerous photos for that you want to get out of their boxes and onto the page!!


Check out the feature over at Practical Scrappers!


Thursday, November 29, 2012

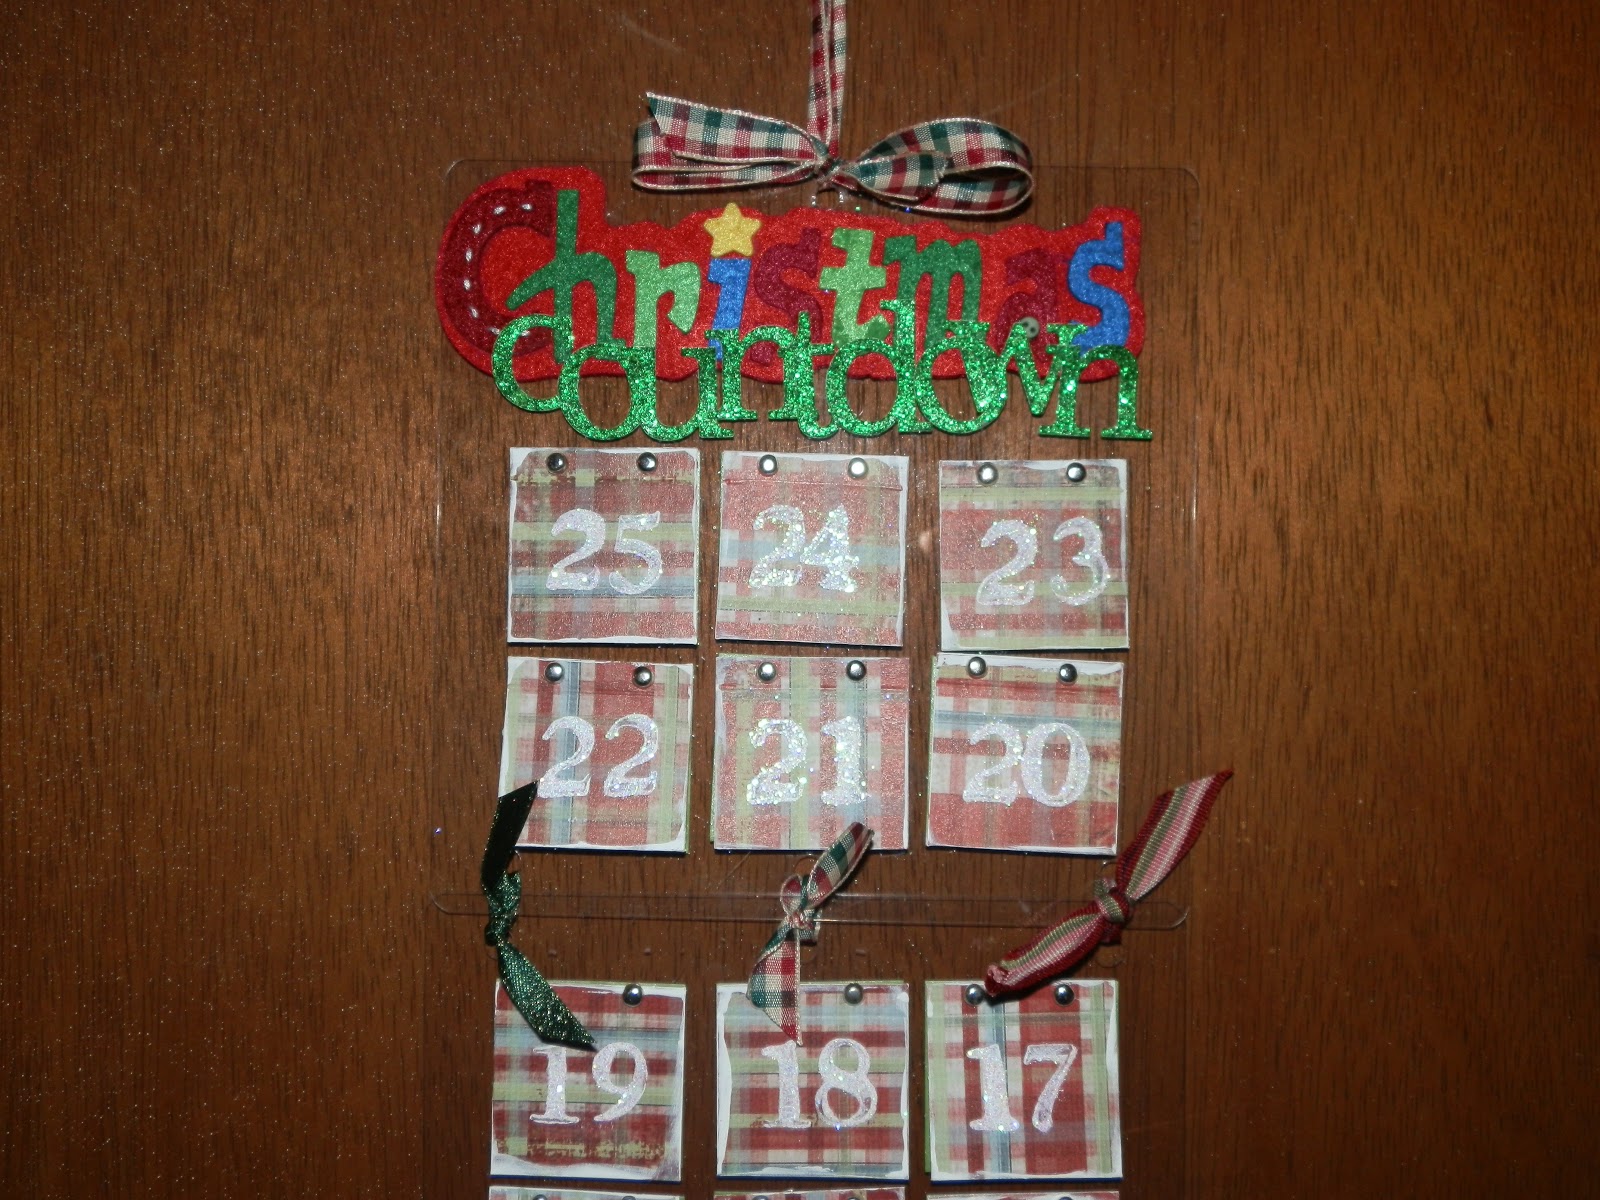
Christmas Countdown or Advent Calendar

Are you super excited to celebrate each moment of this Holiday season? 


I know I am! 


Over at Practical Scrappers today I shared this idea for creating a Christmas Countdown Calendar and I wanted to share it here too!


As a child, everyday in December, I looked forward to opening the door on our Advent calendar to see what fun representation of the holiday season would present itself!  I wanted to create a calendar that my kids can open each day and that I can change out what is behind the doors for next year.  This is what I came up with: 


I used acrylic squares that were intended for an album and used my heavy duty Crop-A-Dile and punched holes so that I could place brads through the acrylic to hold both the front "door" and the back holiday item in place.  To create the snowlike numbers I used white paint on my stamp, immediately after stamping the number, I poured iridescent glitter over it.  When the paint dried, I simply shook off the excess glitter.  Each door got a little "snowy" edging with white paint too.  


Here are just a couple of examples of the goodies behind each door. 


You can use whatever holiday embellishments you happen to have.  I used a wide range of items including brads, stickers, letters, chipboard, 3-d embellies and rub-ons. Symbols of the season.     


I created a title with a pre-made Christmas title and green glitter letters.  


The last day on my countdown does not have a number but a gift that says "Do Not Open Until Christmas"


Hiding behind that gift is Santa and his sleigh and a message that says "Happy Birthday Jesus." 


  Next year, I just need to open the brads and replace the items on the back with fun, new holiday goodies! 


I hope this inspires you to create a calendar to countdown this magical season! 


Happy Holidays to all of our readers! 

Wednesday, October 31, 2012

So Thankful Wreath

Happy November Everyone!! 


 I am so excited to share a new tradition I hope to carry on in our family.  


We made a "Thankful Wreath" to remind us each day of this season of all of the good things we have and that we have so much to be thankful for.  


I started with a straw wreath I picked up at our local Creative reuse store and I wound a brown floral ribbon around it and tied a bow.  


I used my Slice machine to die cut a variety of leaves out of fall colored papers. 


Next, I used rub-ons, stamps, pens and stickers to add the things we are thankful for to the leaves.


I embossed some veins on the back side of the leaves to create a little bit of texture and make them look a little more life-like.   


I used straight pins to place the leaves around the wreath.  Some leaves got one pin, some got two, one in each end to give them a bit of dimension.  


This time of year it is so easy to get caught up in all that has to get done and all the things the little ones wish for.  It is a good time to step back and remind ourselves what we have already been blessed with.  


I intended to hang the wreath on the front door.  I changed my mind quickly though, when I realized we would see it better and more often if I hung it in the kitchen. 


Each time I look at it I am reminded that we have so much and although it does not always seem like enough, it is more than many others have.  


We are truly blessed and I hope that you are too! 


Happy November!


Happy Fall!


Happy Thanksgiving!


Friday, June 29, 2012

Red, White and Blueberry Shortcake!

Red, White and Blueberry Shortcake!


4th of July Dessert Shortcake recipe


Makes you just want to reach into the screen and grab a bite, Right?  Well, they are quick and easy so whip up a batch tonight!


Ingredients:


For Shortcake:


2 c  Bisquick


3 Tbsp sugar


3 Tbsp butter, melted


1/3 c milk


For topping:


1 pint heavy whipping cream


3 Tbsp sugar


1 lb strawberries


1 pint blueberries


Preheat oven 450 degrees


4th of July Dessert Shortcake recipe


Place all of the shortcake ingredients into a mixing bowl and mix by hand just until no dry ingredients remain.


4th of July Dessert Shortcake recipe


Divide the batter into 6 scoops and place on an ungreased baking sheet


4th of July Dessert Shortcake recipe


Bake at 450 for 10 minutes


4th of July Dessert Shortcake recipe


Remove from oven and allow to cool


4th of July Dessert Shortcake recipe   4th of July Dessert Shortcake recipe


 Pour heavy whipping cream and 3 Tbsp sugar into a bowl and beat with a hand mixer or in a stand mixer for about 10 minutes, until the form stiff peaks.


4th of July Dessert Shortcake recipe


Slice the strawberries, reserving 6 for garnish


4th of July Dessert Shortcake recipe


Use a masher to mash the sliced strawberries


4th of July Dessert Shortcake recipe   4th of July Dessert Shortcake recipe   4th of July Dessert Shortcake recipe   4th of July Dessert Shortcake recipe


Place shortcake on plate, add strawberry mash, about 8 blueberries, whipped cream


4th of July Dessert Shortcake recipe


A couple more blueberries and the whole strawberry as garnish and ENJOY! YUM!!


Check out our other Patriotic Crafts from this week!


Please Join Us and Share in Our Community of Creativity!